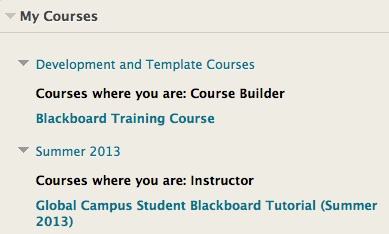
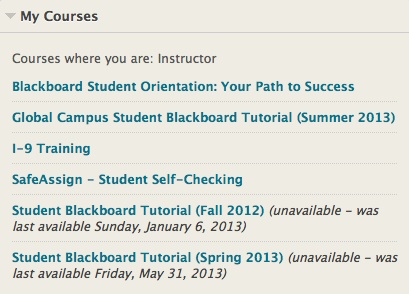
By default, the My Courses module shows all of Instructor’s courses including previous semesters. After multiple semesters, this list may become cumbersome. There are several methods instructors can use to make their My Courses list more manageable including grouping by term, hiding sections within a master course, editing individual courses, and adding useful links.
Organizing Courses by Term
- Hover over the My Courses module title and the gear icon will appear. Click on the gear and you will be taken to a page where you can manage the My Courses module
settings.

- Look for the checkbox next to Group by Term. Check the Group by Term box to open Term options.

- Check the box next to terms you would like to have displayed and drag the term name to re-arrange the order of the terms. Click Submit. If you check the expand term box, the list will be expanded in the My Courses module.
In the My Courses module you can click the triangle next to the title of the term
to collapse the term.
Note: When you uncheck a box under show term, the term is not deleted merely hidden. You can always return to this setting page and show it again.
- When the page refreshes, your new display preferences will be shown.

Hiding Sections within a Master Course
Faculty using a master course that combines multiple sections can shorten their My Courses list by hiding the individual sections. To identify which courses in your list are master courses and which are combined sections, click one of the courses. You are viewing a section and not a master course if the you see a banner that says, “Unavailable child course: Students will not see changes made to this course. Please work in master course.” When working with combined sections, manage and edit content using the master course. Edits made to individual sections will not be available to students.
To hide these individual sections from the My Course list:
- Log into https://southplainscollege.blackboard.com/ with your SPC username and password.
- Mouse over the My Courses area and click the My Courses Module Settings gear icon in the top right.

- Uncheck the boxes next to the child courses to hide them from your My Courses list.
Note: To remove all check marks in a single row at once, uncheck the box in the column named “Course Name.” Just the course’s name is the minimum display option. Only rows which have checks in every checkbox will have a check mark in the “Select All/Unselect All” column. Marking the “Select All/Unselect All” checkbox will place a check mark in all other check boxes in the row. Removing a check mark from the “Select All/Unselect All” checkbox removes all of the check marks in the row. - Click Submit. Refresh the page to show your changes.
When working with combined sections, you will manage and edit content using the master course. Edits made to individual sections will not be available to students.
Editing Individual Courses in Your Course List
The same method used for hiding sections in a master course can be used for other courses as well. You can also choose to select individual courses to Hide or Show using the Edit Course List area. Return to the gear icon to access the page where you can manage the My Courses module settings. Unselect the box next to a course to remove it from your My Courses list when the settings are saved. After a course has been hidden, you can return to the gear icon at any time to recheck the boxes and make a course return to your My Courses list.
Adding Useful Links
Note: One final area of use within Edit My Courses is the ability to add links to other pages. Although the area is titled Edit List of Courses on Other Systems this area can be utilized for the links you most commonly use when working on Blackboard.


